Public booking pages
A schedule other people can book on their own, the public page a guest sees, and the manage link for the appointment.
Your booking pages
Publish a schedule other people book on their own from Booking pages. You reach it in the sidebar, under Planning, right below Calendar, and also in the calendar header's More options menu.
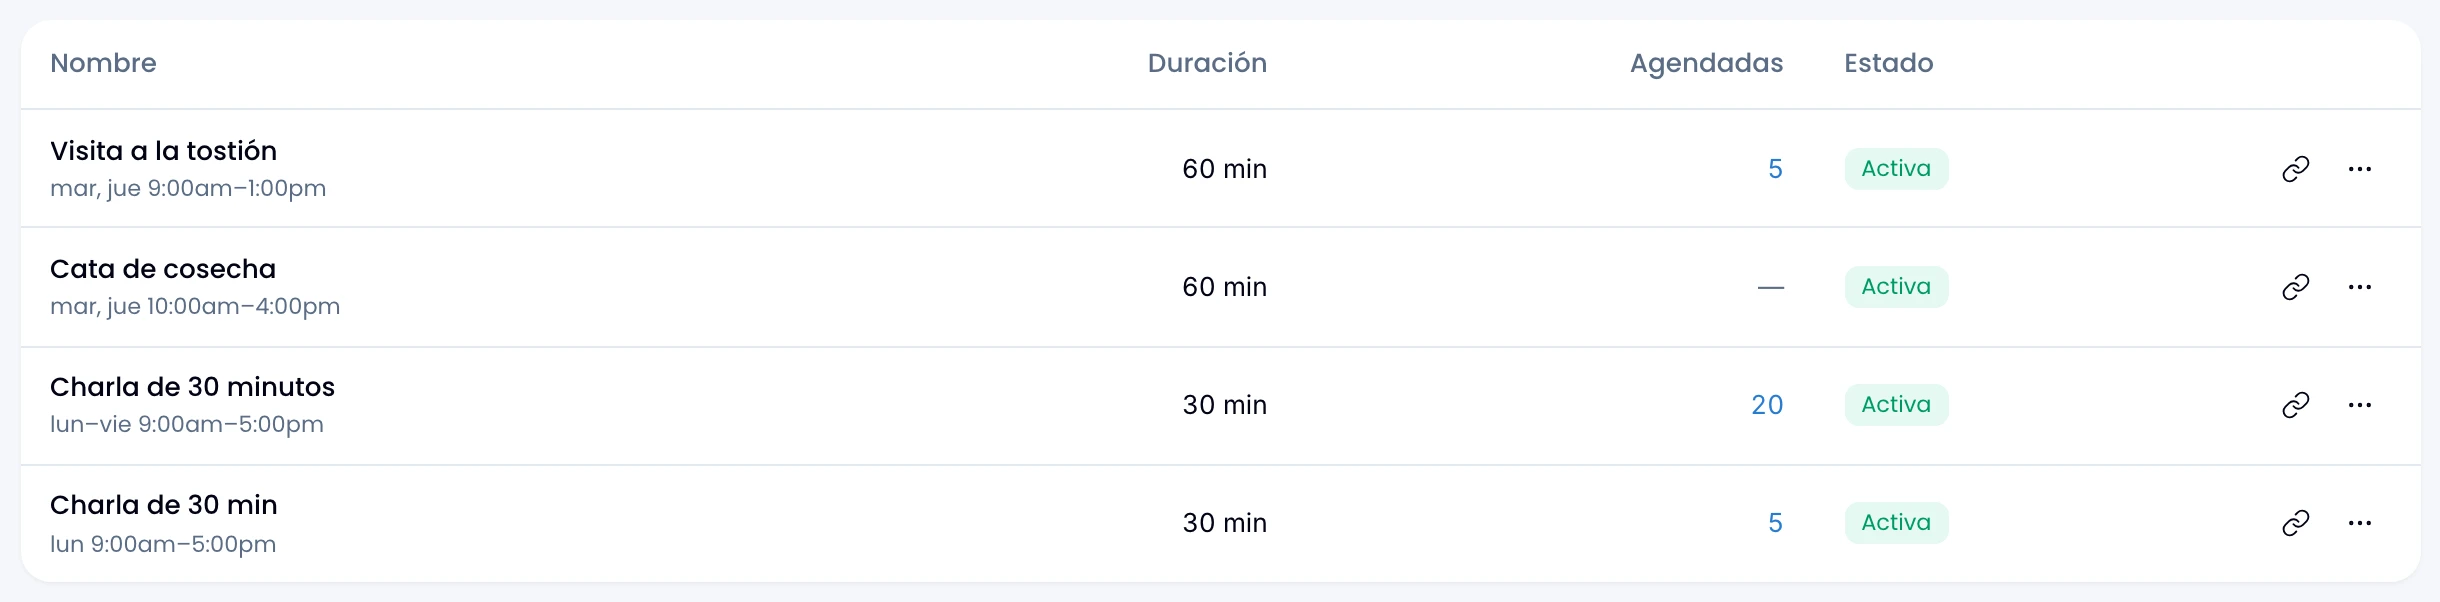
Each schedule takes a row with its Name and its availability summary, its Duration, its Booked appointments and an Active or Inactive status. Click the number under Booked to open that schedule's upcoming bookings.
Create a new schedule with New page, at the top right. Filter by status from Filters, sort by name, duration, creation date or last update, and search by name or slug. All of it lives in the page's address, so you bookmark or share the view exactly as you left it.
Click a row to open that schedule's editor. Copy link, at the end of the
row, copies the schedule's public address, in the form /book/your-slug.
The ⋯ menu carries Edit, Bookings, Deactivate or
Activate, and Delete, which asks for confirmation.
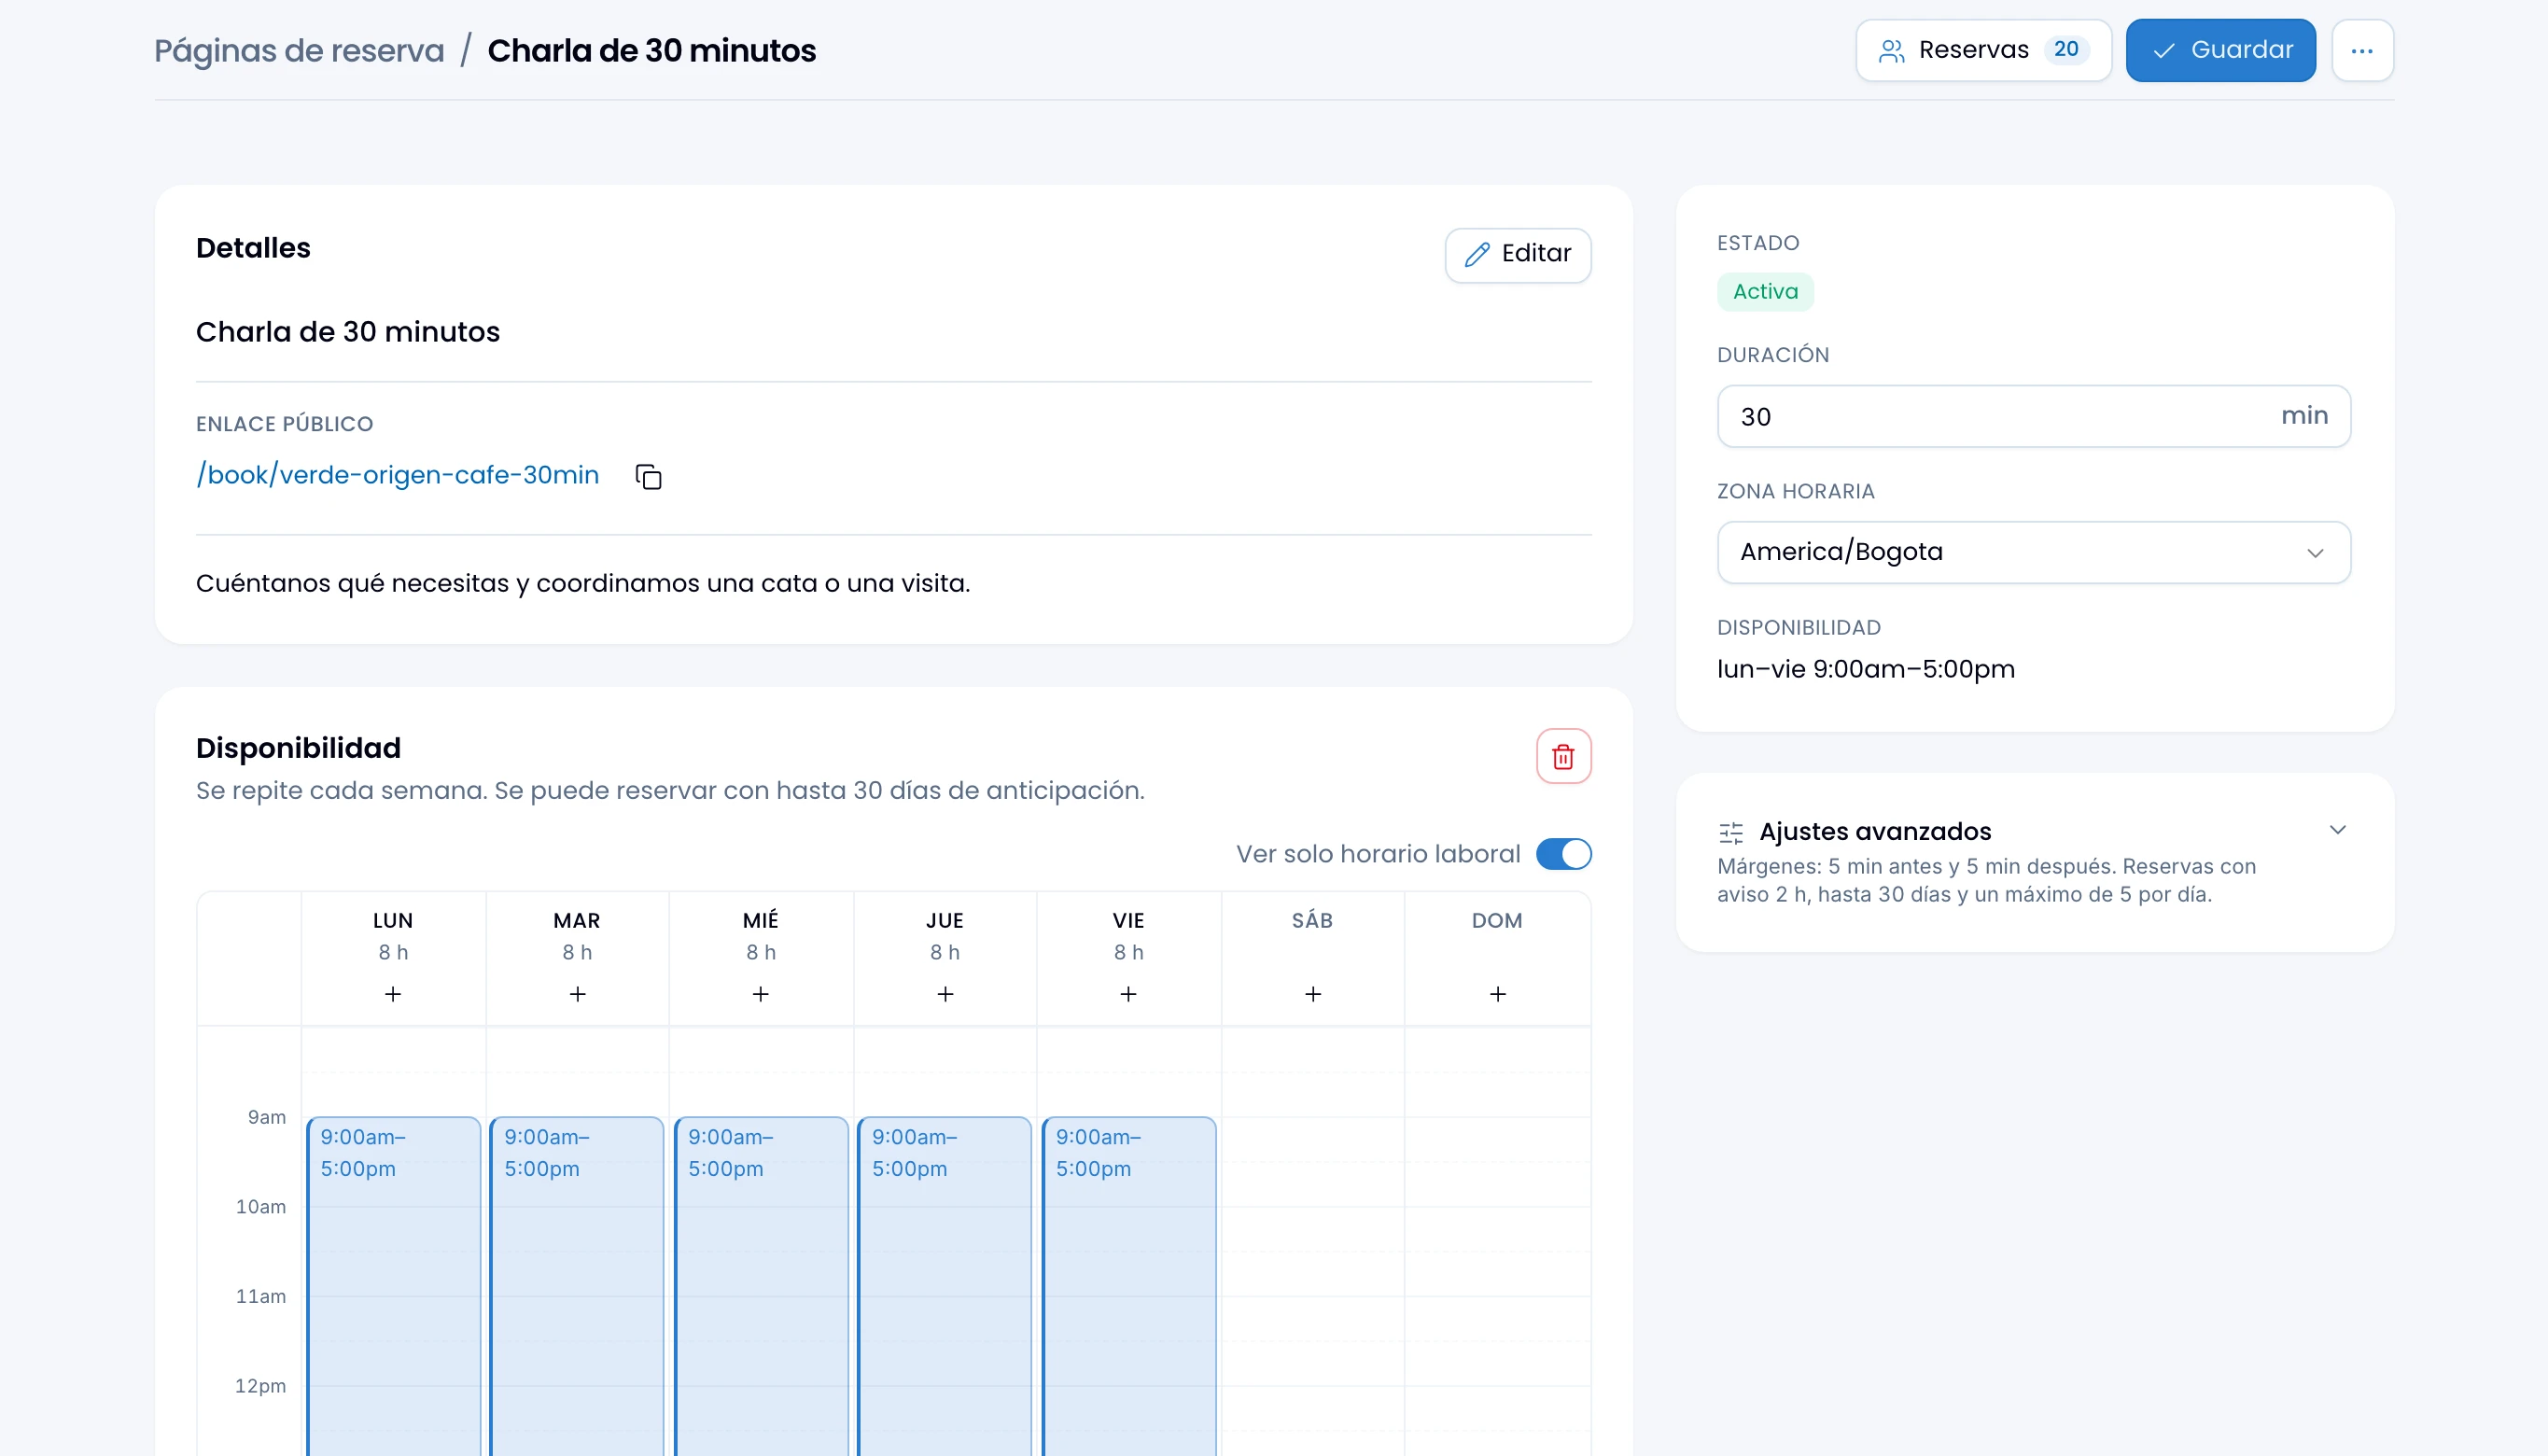
A schedule's editor
Edit each schedule on a page of its own, and store the changes with Save. From there you open Bookings, which carries the number of upcoming appointments, and the ⋯ menu, with Activate or Deactivate and Delete.
A saved schedule shows its Status as Active or Inactive, and you change it with Activate or Deactivate in the ⋯ menu. While you are creating the page, you turn that same status on or off with its switch. There you also set the Duration in minutes and the Timezone, and keep the Availability summary and Advanced settings at hand.
Details holds the title, the public link and the description. On a saved
schedule, use Edit to change all three. Type the link after /book/:
Swarm checks it live as you type, and a button suggests a random one. That
link is unique across the whole suite, so two different workspaces cannot
use the same one. Copy it from this same card.
Paint in Availability the hours you offer each week. Drag over a day to create a time range, move a block to change its hours, stretch its edges to lengthen or shorten it, and remove it with its button or the Delete key. Tap the + under a day name to add a 9am to 5pm range to that day. Blocks snap to the half hour and merge on their own when they touch. Every range has to be at least as long as the appointment; if it is not, the editor says so under the grid and will not save. Flip Show working hours only to go from your working band, which is how the grid opens, to the full 24 hours. A range outside that band shows the same in both positions. The trash button empties the week, and each column adds up its total hours. Under the title, Swarm reminds you that the week repeats and how many days ahead people can book, with the number you keep in Maximum advance.
Your working hours only decide how much of the day the grid draws, never what can be booked: that is decided by the ranges you paint and nothing else. That band runs end to end of your working week, yours or the workspace's if you inherit it. With none configured, it runs from 8 in the morning to 8 at night.
Add in Questions for the booker the fields whoever books will see, and mark which ones are required with their switch.
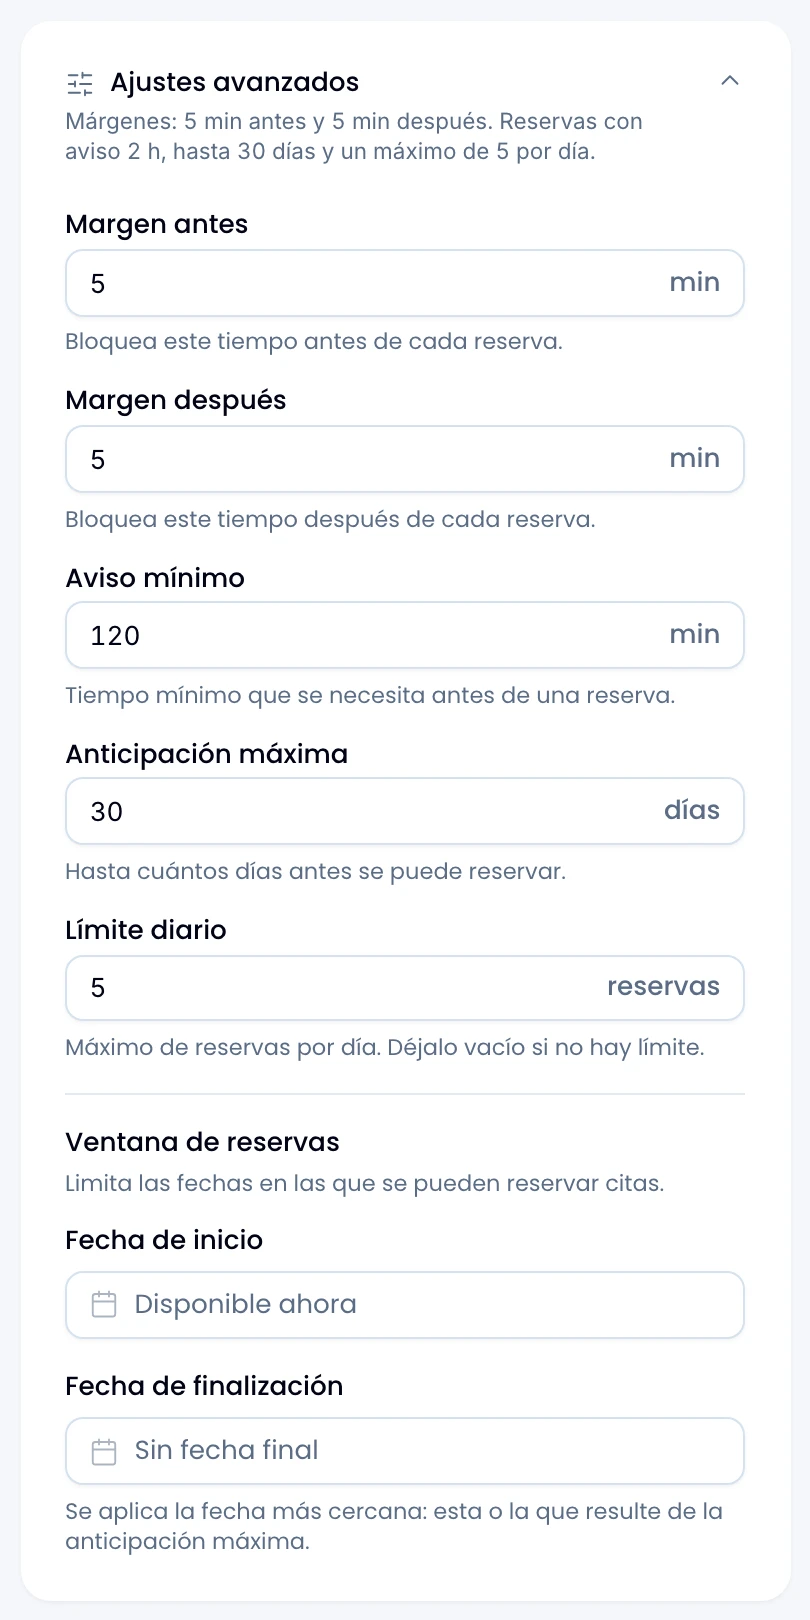
Open Advanced settings, below Availability, to fine-tune when people can book: buffers before and after, minimum notice, maximum advance, the daily limit and the Scheduling window, with its Start date and its End date. Folded, it sums up what you have set. Leave both dates blank to sit at "Available now" and "No end date"; as soon as you set either one, the summary names the window.
Set a Minimum notice shorter than the Maximum advance. If it is not, the editor flags the field, refuses to save, and keeps the card open until you fix it. Maximum advance never stays blank, and a new page opens with 60 days. Daily limit you can leave blank for no limit. That limit decides whether a day is still open rather than trimming the times it offers: until a day reaches its limit, your page offers all of its free times.
How the limits combine
The four limits in Advanced settings trim the same stretch of calendar from both ends. A time is offered only if it survives all four.
The front end belongs to Minimum notice and the Start date. Minimum notice pushes the first bookable time forward from this moment: with two hours of notice, nobody can take anything in the next two hours. The start date does the same with a fixed day on the calendar. Whichever falls later wins, so a start date already behind you brings nothing forward, and a start date in the future opens the page on that day.
The far end belongs to Maximum advance and the End date. Maximum advance counts days forward from today and travels with you: with 60 days, today reaches 60 days out and tomorrow reaches one day further. That is why nobody can book past a certain point even though the week is painted. The week does repeat; it is not offered any further out. The end date is a fixed stop, and whichever falls first wins. So an end date can only shorten the reach, never extend it: setting it years away opens not one extra day, and setting it next week closes the page from there on.
If your page shows no times at all, the answer is almost always in this stretch: the week is unpainted, the scheduling window has not opened yet or has already closed, minimum notice eats the days still in view, the day has reached its daily limit, or those hours are already busy on your calendar.
A schedule's bookings
Open Bookings to see who booked that schedule. Search by name or email, filter by Period, with Upcoming, Past and All, and by Status, and sort or page through. The drawer opens on Upcoming. Its table carries Person, with the name and email of whoever booked, Date, with the day and time in your timezone, and Status: Confirmed, Cancelled or Rescheduled.
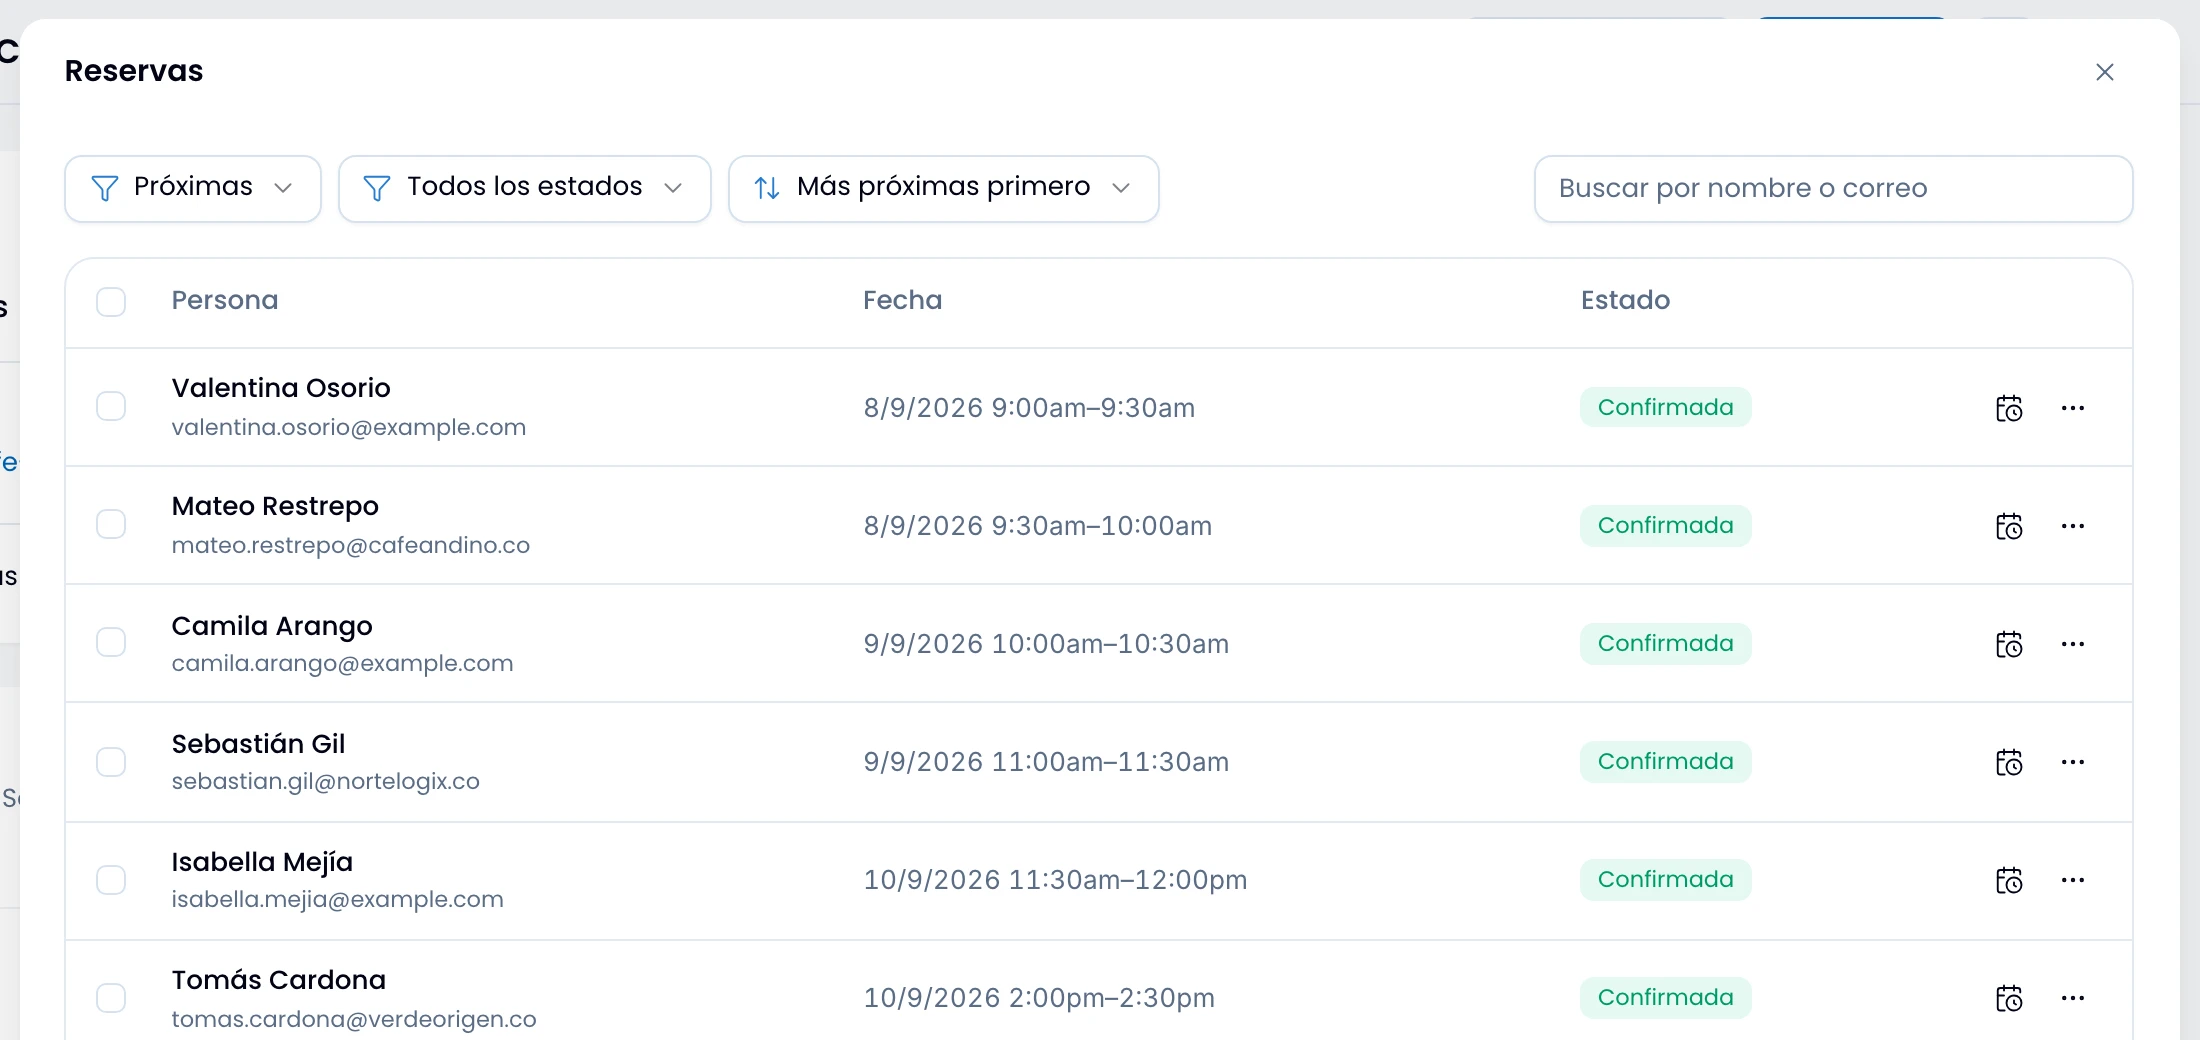
Click Reschedule, on the row itself, to open the day and time picker. The ⋯ menu carries Save as a Wrap contact, which creates the contact as a Lead and does not duplicate anyone already there, and Cancel, which asks for confirmation. Select several rows to use three actions at once from the toolbar: Save as a Wrap contact, Reschedule bookings and Cancel bookings. The last two act on the confirmed bookings in your selection and on no others.
Moving several bookings to another week
Open Reschedule bookings to take the whole selection to another week in one pass. Pick the Target week first: Next week, In 2 weeks and the ones after them, as far as your Maximum advance reaches. Each option carries its dates, and changing week rebuilds the plan.
Swarm builds that plan under New slots, one row per booking. Each one takes the free slot closest to its own: the same weekday at the same hour, failing that the same weekday at the nearest hour, and if that day is full, the first free slot of the week. A booking that ends up on another day carries the Other day badge. Two bookings never land on the same slot.
Change the plan before you confirm it. Open a row's picker to send it to any slot still free, or choose Don't move to leave that booking where it is. What you pick by hand wins over the automatic placement.
If the week has no room for all of them, Swarm places what fits and tells you how many were left out. Pick another week, or move those separately from their own row.
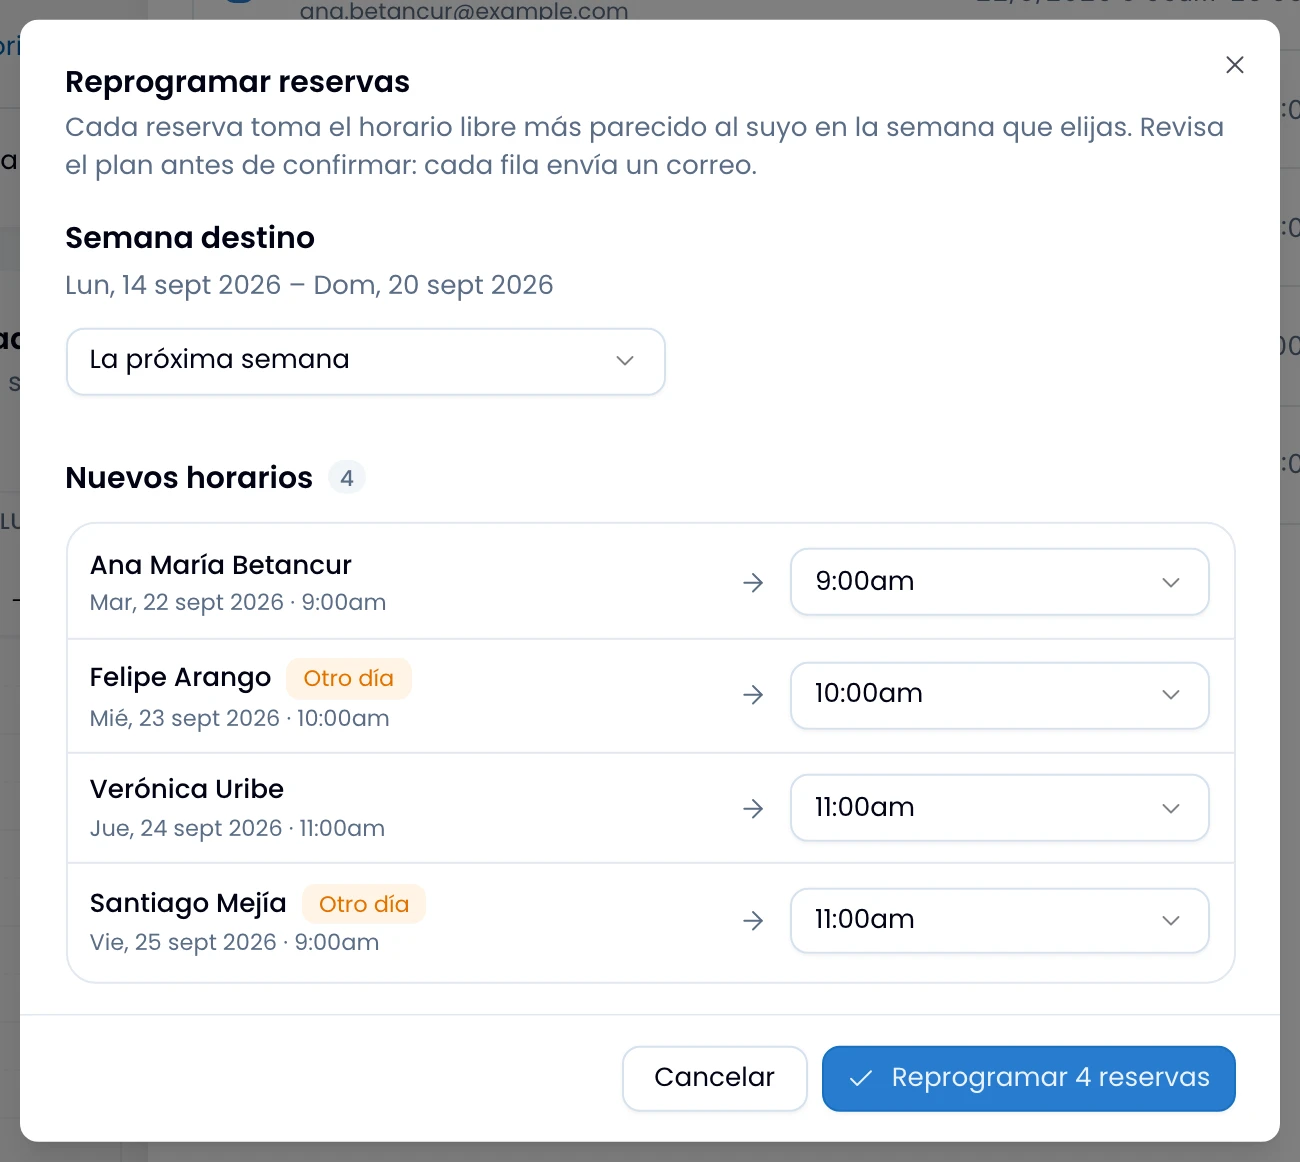
Press Reschedule, which names how many bookings are about to move, to write the plan. Each row moves the event on your calendar and emails whoever booked, exactly as if you had moved them one at a time. When it finishes, Swarm tells you how many moved and leaves the rest ticked, ready for another pass.
When a guest books or changes an appointment
Swarm tells you the moment someone books, cancels or moves an appointment on one of your schedules. The notice reaches the bell in the app bar, and your phone if you keep push on, with the name of whoever booked, the schedule's name and the appointment's time.
All three moments reach you by email as well, in your language, your timezone and your clock format:
| Subject | What it carries |
|---|---|
| New booking | Who booked and the time they took. |
| Booking cancelled | The time that is free again on your calendar. |
| Booking rescheduled | The Previous time next to the new one. |
All three name the schedule in the subject and carry the Guest among their facts. The new-booking and the rescheduled ones carry View in Swarm, which opens the appointment on your calendar.
Stop them with Unsubscribe from these emails, at the foot of any one of them. Bell notices are unaffected. If you turn Swarm's email off on Nest's Account page, these stop as well.
When you are the one cancelling or rescheduling a booking from Bookings, Swarm does not notify you.
What a guest sees
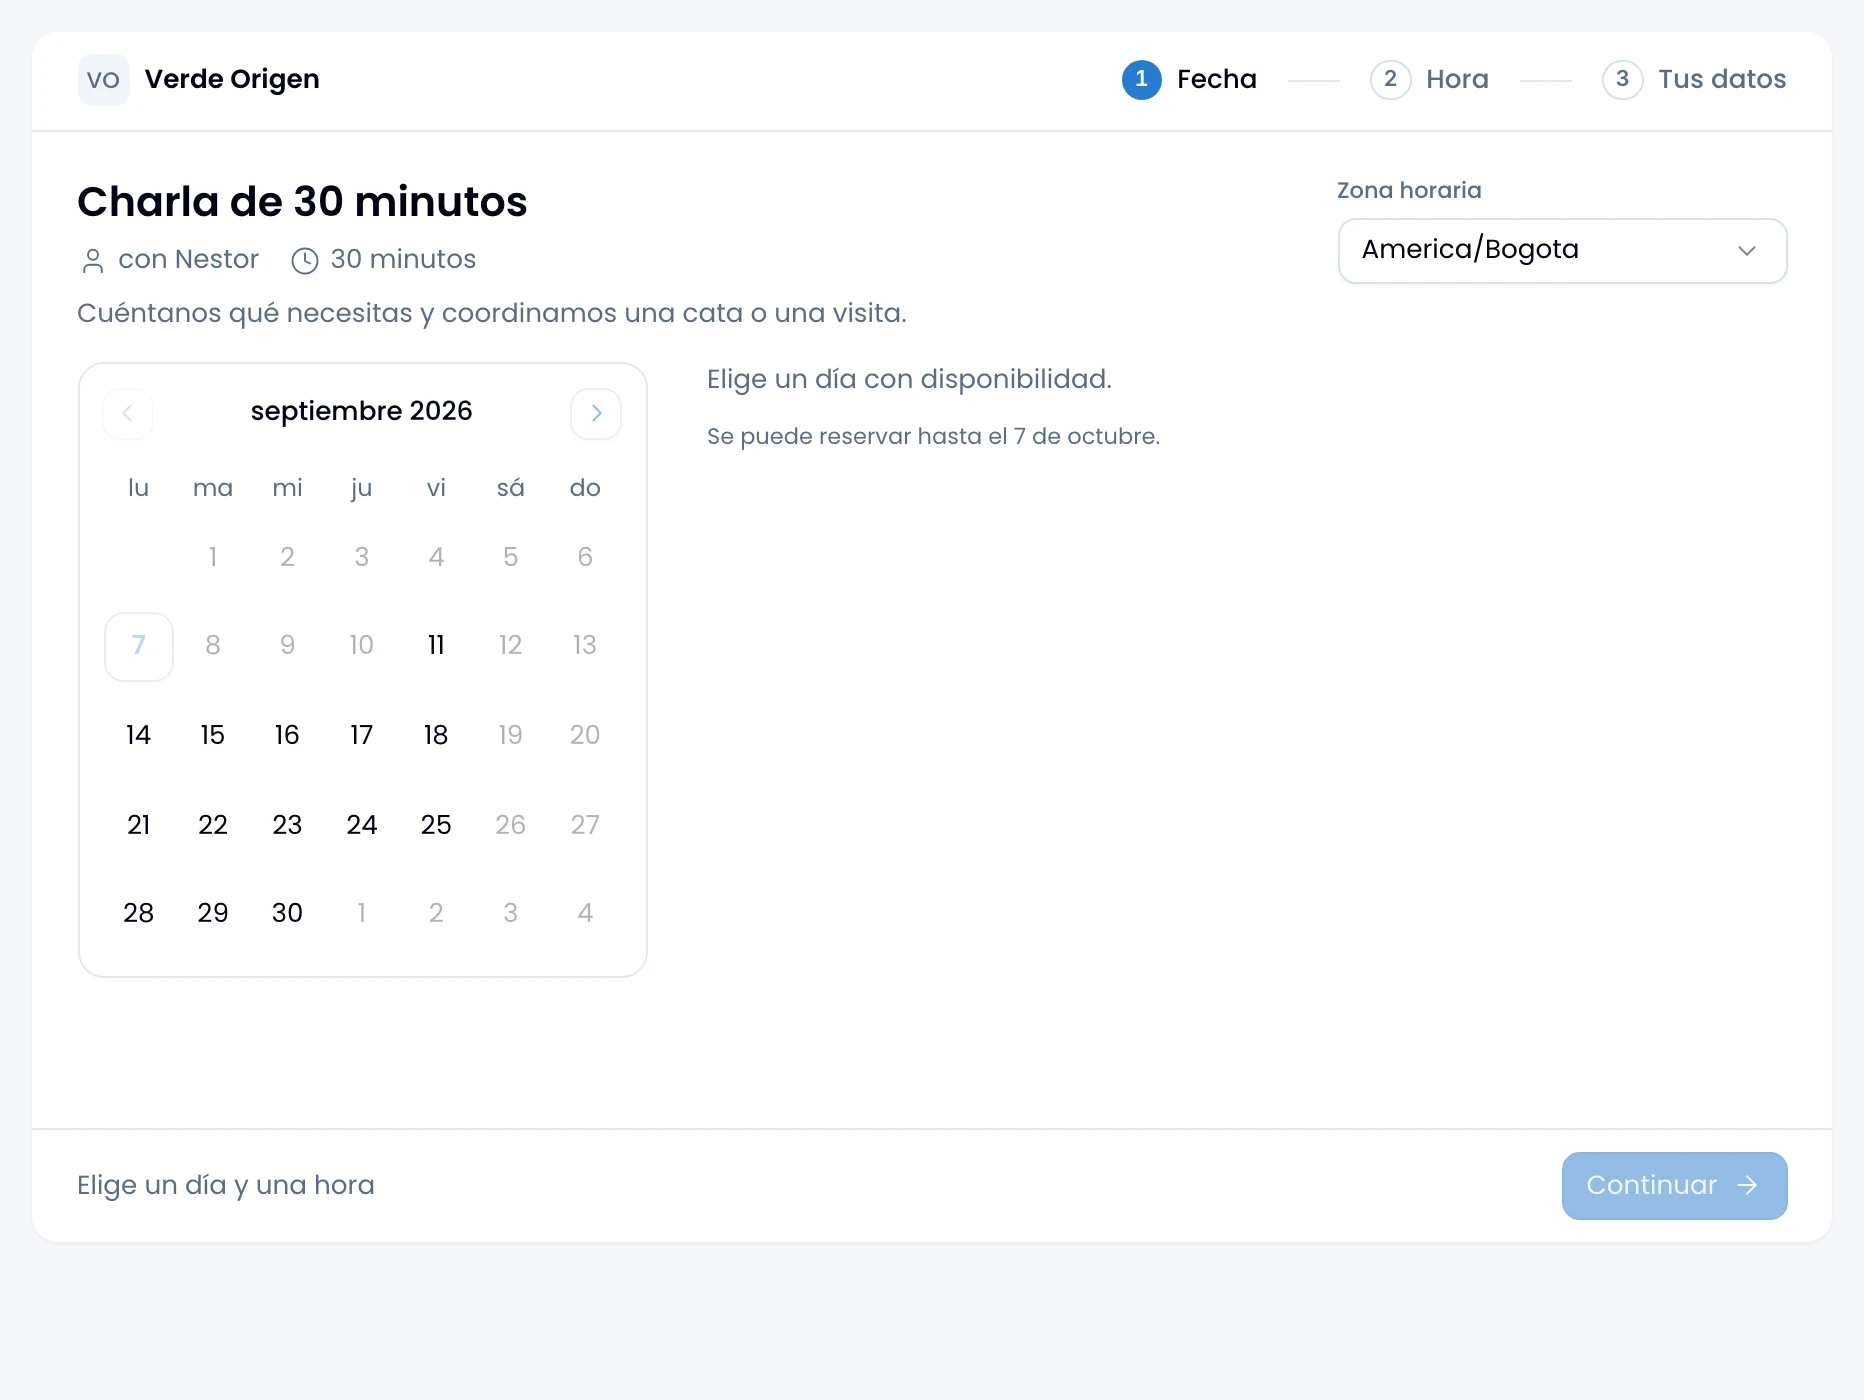
Whoever opens your link books in two screens, guided by the steps Date, Time and Your details.
On the first they pick the day and see that day's free times; days with no free time are disabled. While they pick day and time, they change the timezone in the selector that opens on the detected zone, next to the schedule's title. Times come out in whichever zone they pick, in your clock format, 12 or 24 hour, the one you keep as the schedule's owner. Picking a time enables Continue.
On the second they fill in the form: name, email, the questions you defined, and notes. The appointment summary carries Change date or time to go back to the previous screen, and below sit Back and Confirm booking. Then comes the confirmation, on the same page, with the manage link, a button to copy it, and a note that it was also emailed.
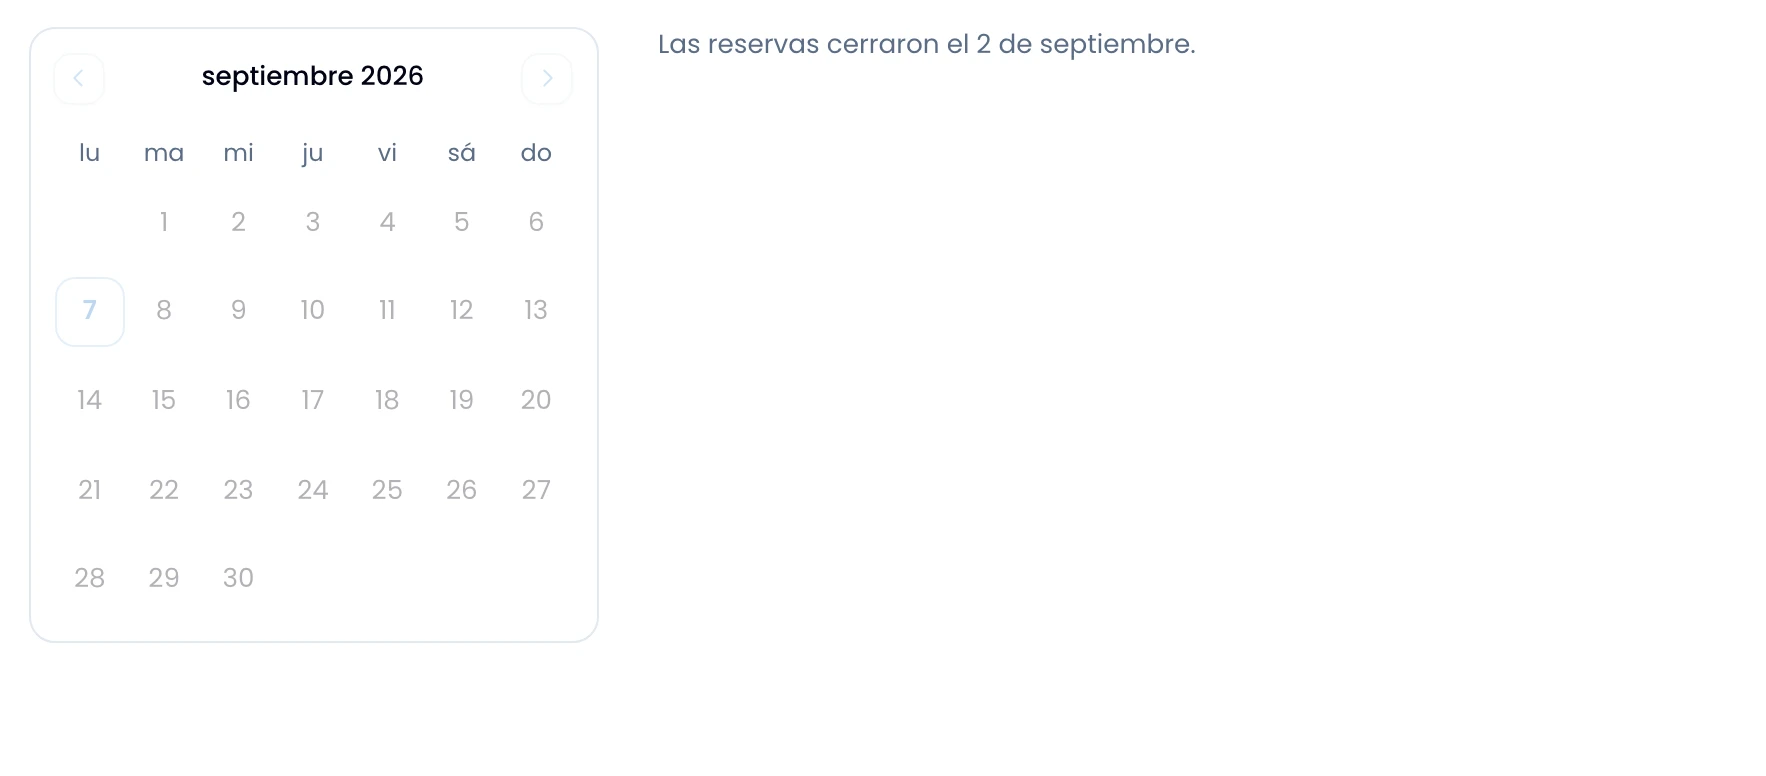
The page tells the guest which state your scheduling window is in. Before it opens, it names the day bookings open. Once it has closed, it names the day they closed. With the window open, it names the last date that can be booked, and the calendar will not page past that date either.
The page has no sidebar and carries your workspace's mark in its header: its avatar and its name, exactly as you keep them in Nest. With no avatar, its initials are used.
The manage link
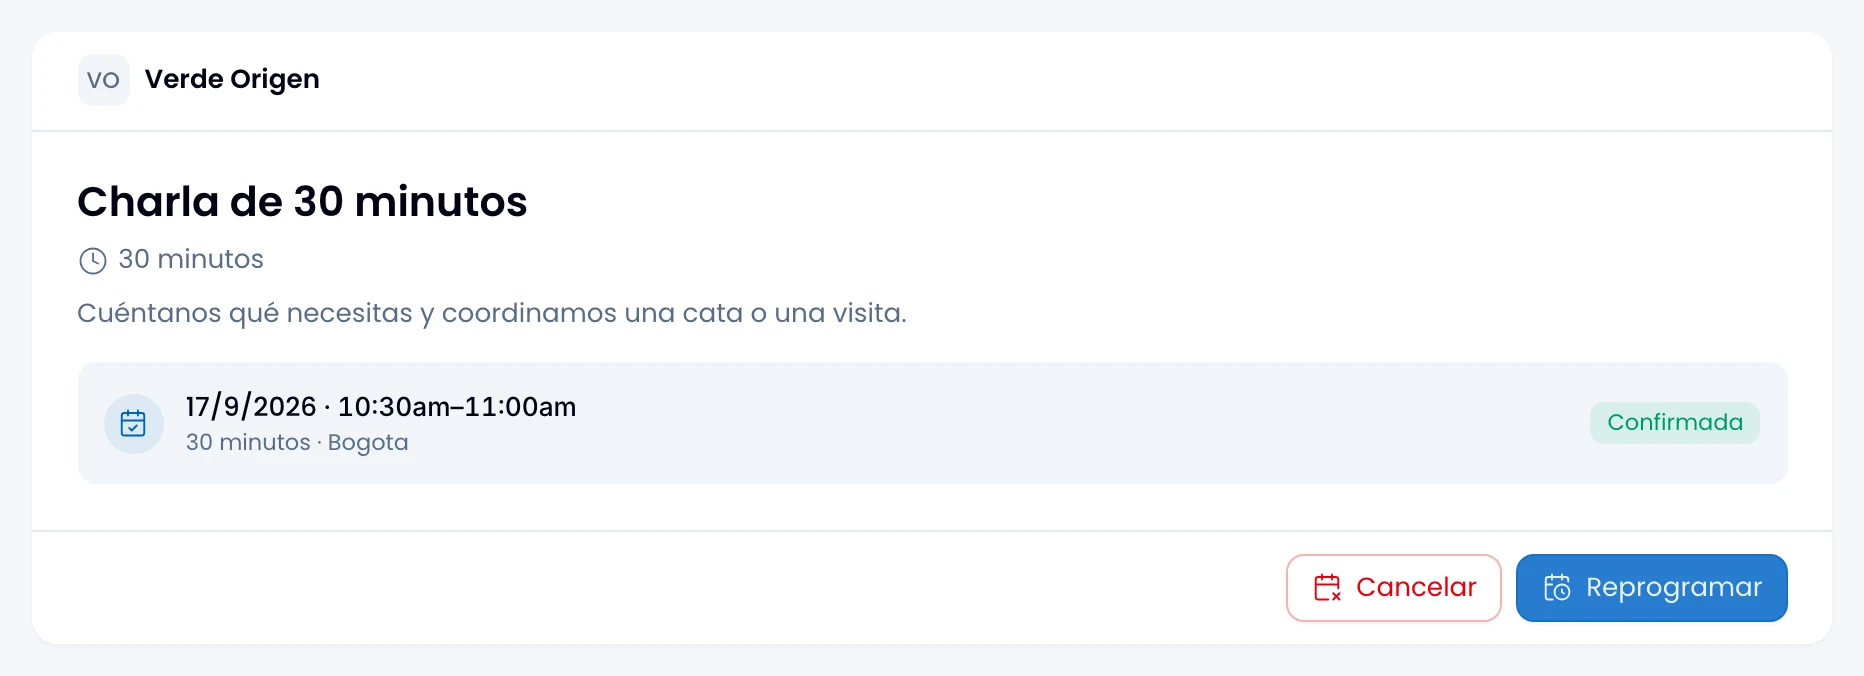
Whoever booked returns to their appointment from the link they saved on the confirmation screen, or from the button in their email. The page carries the schedule's name and duration, the appointment's day and time, and its status: Confirmed, Cancelled or Rescheduled.
Reschedule opens the day and time picker on the same card, with the current appointment above it, labelled Current time. Picking a time repeats it at the foot of the card, and Confirm new time saves it. Back leaves the appointment as it was. Times come out in the timezone the booking was made in, the one it was stored with.
Cancel asks for confirmation and leaves the appointment marked as cancelled.
A rescheduled appointment lives at a new link: the page's address updates on its own and the previous one stops working. The new-time email carries that link. If you reschedule it yourself from Bookings instead, that person's link stays the same.
The guest's emails
Whoever books gets a confirmation email with the appointment's details and a button that opens their manage link.
Every change to the appointment reaches them by email too, whether they made it or you did. When they cancel from their link, the email names the time they had. When they reschedule from there, the email carries the new time and a button to the new manage link. That keeps their own appointment within reach even if they close the tab.
If you cancel a booking from the Bookings drawer, that person gets the same cancellation email. If you reschedule it from there, they get the new-time one, and their manage link stays the same.
All three name the schedule in the subject line, so give the schedule a name that reads outside your team.
Pausing and resuming bookings
Turn off Enable public booking pages, in Workspace › Calendar, to stop taking appointments across the whole workspace. While it is off, no booking link opens and you cannot create new schedules. An appointment that is already confirmed is still managed from its link.
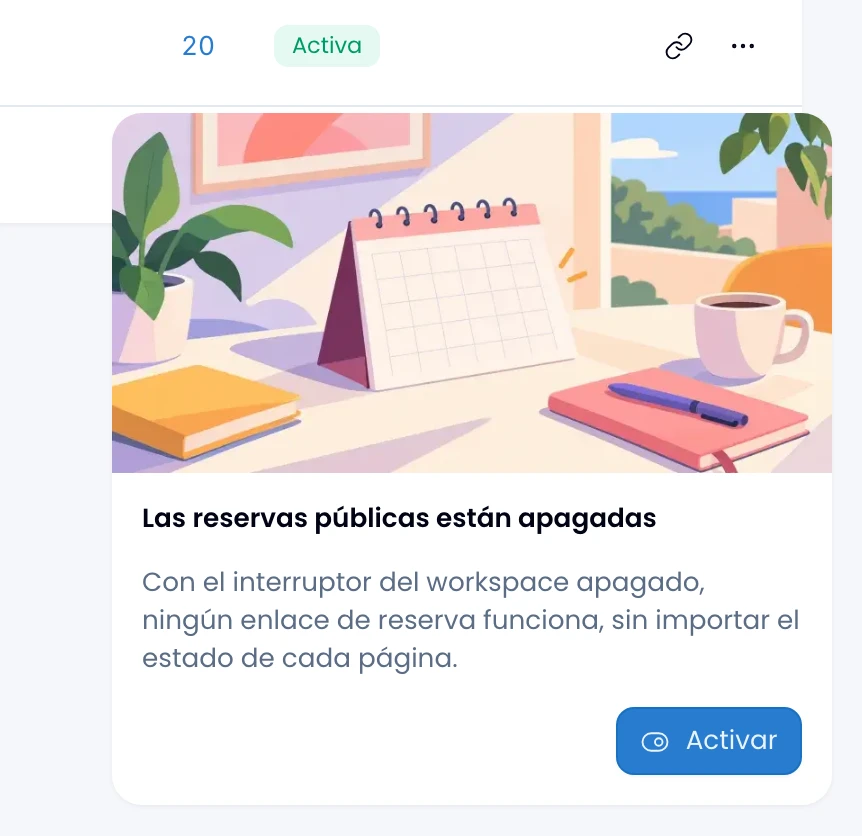
Resume from Booking pages without going to settings: while bookings are off, the list carries the card Public booking is off in a corner, and Turn on switches them back on right there. Links open again immediately, and New page creates again.
To close one schedule and leave the rest open, use Deactivate in its ⋯ menu.
If that card carries no Turn on, a Swarm admin turns the switch on.